How to Grow Garlic From Bulbs – A Versatile Herb_
If you grew up in an Italian family like I did, garlic was always around. It could be found, waiting to be cooked, hanging in clumps over the sink, in bowls on the counter, or in your refrigerator crisper section. Garlic is a versatile herb. Or is it? Read on to see what garlic actually is and how to grow garlic from bulbs.
What Is Garlic?
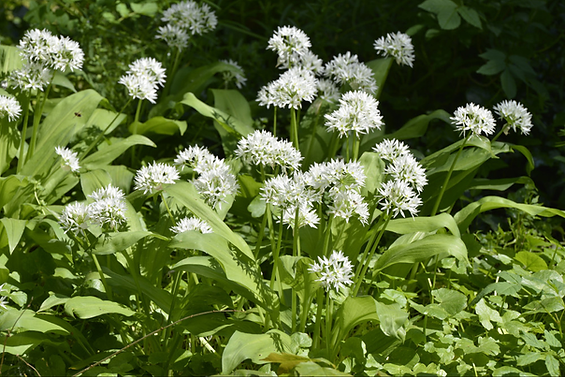
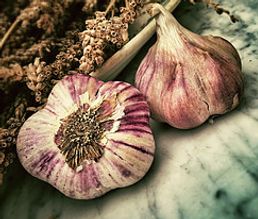
Garlic is in the genus Allium and is a species of bulbous flowering plants. It is a relative to the lily plant and is a herbaceous perennial that can be grown outside in gardens or inside in pots. But is it a spice, an herb, or a vegetable?
Garlic is grown underground in the form of a bulb. It has long, green, edible stalks called scapes and even the flowers are edible. The bulb consists of individual sections called cloves. When botanists classify garlic (Allium sativum) it is considered a vegetable because it has the characteristics of a vegetable. Vegetables have bulbs, tall stems and long leaves.
How to Grow Garlic From Bulbs
Which Bulbs to Purchase
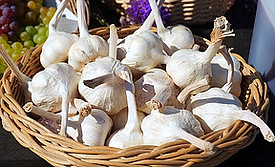
When planting garlic cloves at home, be sure to purchase garlic bulbs that are organic and from nurseries, not supermarkets. Bulbs from supermarkets are massed produced in warm weather climates such as California and China and are not suited for planting in your own area. In addition they may contain pests and diseases and also may have been doused with chemicals that inhibit sprouting.
===Buy Organic Garlic From Etsy===
When to Plant Garlic Bulbs
In Colder Climates
For larger bulbs at harvest, plant garlic in the autumn 6 to 8 weeks before the first frost. This will give them time to establish roots before the ground freezes and before they begin to sprout.
Garlic grows best if it has time to go dormant in temperatures 40 degrees F or below for approximately 4 to 8 weeks. In the spring the garlic will wake up and begin to push greenery through the surface and will later begin to produce bulbs.
In Milder Climates
If you live in a milder climate, you can plant the cloves outside in February or March. Planting in early spring will produce smaller cloves. However, they will still have the same pungent flavor and retain their potency as a powerhouse of nutrients when it is time to harvest them.
Choose a Site and Prepare the Soil Outdoors
Sun Requirements
Garlic thrives in full sunlight. Choose an area where the cloves will receive 6 to 8 hours of sun. If the cloves are planted in partial shade, they will produce smaller bulbs but will probably still have the same garlicy flavor.
Soil
A week or so before planting, prepare the soil with organic compost or aged manure. Work it in to about 6 inches deep while breaking up clumps of soil and removing rocks, stones, old roots and weeds. Use a sizeable amount to amend the soil because garlic likes well-drained rich soil. If the bulbs sit in soggy soil, the cloves will rot.
Fertilizer
Right before planting your cloves, add a few tablespoons of bonemeal, fishmeal or a good 5-10-10 fertilizer (sold at Amazon) to the soil. Then work it in several inches deep where the bottom of the cloves will rest.
Raised Beds
If you have clay soil, it is best to build a raised bed and prepare the soil as explained above. Ideally the bed should be about 2 to 3 feet wide and 10 to 12 inches deep. A small raised bed is sufficient for growing garlic. It is also easier to manage, especially if you are a beginner gardener.
Below is a video on how to make a raised bed.
Caution: Do not use pressure treated wood. The chemicals will leach into the soil and eventually into your plants.
If you are not in the mood to build a raised bed, how about purchasing a pop up greenhouse? There are many to choose from Quictent.
Planting the Bulbs
-
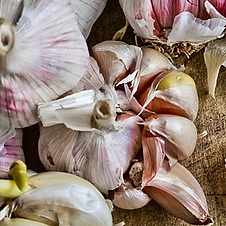
Once your bed is prepared and you have purchased garlic bulbs, choose one that is large, healthy and disease free.
-
Separate the cloves from the bulb. Keep the thin papery husk on each clove to prevent bacteria from forming on the clove and to minimize early sprouting.
-
Using a trowel, dig shallow trenches in the soil about 2 inches deep. The trenches should be 6 to 12 inches apart.
-
Plant each individual clove tips up 4 to 8 inches apart in the trench.
-
Once the cloves are planted, cover the trench with soil leaving the tip of the clove just below the surface of the soil.
-
Remove any weeds that crop up in your garden. If you allow them to stay, they will inhibit the growth of your garlic.
-
Water your cloves well after planting but do not water over the winter.
Mulching
It is important to heavily mulch the cloves with straw or leaves if you live in a climate where the ground freezes.
In the spring after the last threat of frost, remove all the mulch.
When temperatures begin to moderate, shoots will pop out of the soil. Cut off any flowering stems because the flower will strip nutrients from the bulb causing your plant to produce smaller bulbs.
Fertilizer
Garlic likes its fertilizer. In early spring, sprinkle your bed with a good nitrogen based, pelleted fertilizer.
Caution: Be sure to choose a fertilizer for edible vegetables.
Fertilize again in mid May when the daylight lengthens and before the bulbs begin to swell.
Watering
Water every 3 to 5 days during the “bulbing” season, usually from mid-May through June. If it is an exceptionally dry May and June, water your garden to a depth of about 2 feet every 8 to 10 days. You can determine the irrigation depth by sticking a dry yard stick (meter stick) into the ground. After you pull it out, there should be a definitive line as to where the irrigation stopped.
Taper off the watering around mid-June.
Pests/Diseases
Garlic bulbs are a good thing to have in your garden. It is a natural pest repellent and diseases will rarely plague your garlic.
Varieties of Garlic
There are mainly two varieties of garlic.
Hardnecks:
This variety is very cold hardy and will produce bulbs with a more subtle flavor. Choose these if you live in colder climates.
Remove the flower stems in early spring to encourage the bulb to grow nice and plump. Use the stems in salads and culinary dishes. They have the same flavor as the garlic bulb.
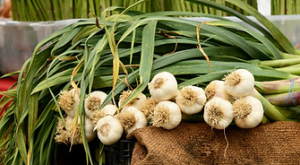
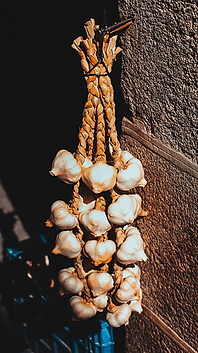
Softnecks:
These grow in warmer climates. They have a soft neck and are the variety you see twined together hanging from beams. They have a strong, more pungent flavor and last longer than hardnecks when stored. Softnecks produce larger bulbs than hardnecks.
Harvesting Garlic
When to Harvest
If you planted garlic in the fall, it will be ready to harvest in July. Once the tips of the leaves start turning yellow and fall over, that is the clue that the bulbs will be ready to harvest very soon. Do not allow the bulb to dry out completely in the ground.
If you planted garlic in the early spring, it will be ready to harvest sometime in August. You can calculate the harvest time based on the time for maturity of the variety that you purchased. Find this information on the package in which the garlic was contained at the time of purpose.
How to Harvest
Do not harvest all your garlic at the same time. Test one bulb to see if it has matured enough by gently lifting one plant out of the soil.
Ready to Harvest?
If the bulb is divided into cloves and the outside covering is thick, dry, and papery, it is ready to harvest.
Not Ready to Harvest?
If the bulb wrapping is thin and easy to crumble, place the bulb gently back into the soil.
DO NOT LEAVE THE BULB IN THE GROUND TOO LONG. The bulbs may begin to split causing bacteria to enter the cloves and reducing its longevity in storage.
When Harvesting:
When the bulbs are ready to harvest, carefully lift the plant including the roots with a garden fork. Remove any excess soil from the bulbs and roots but do not remove any foliage or roots.
Lay them out in a single layer in a garden shed or other dry area and allow them to thoroughly dry, which should take 2 to 4 weeks. You can also braid the scapes together and hang them where there is good air circulation.
Storage
When the foliage shows no sign of moisture, cut off the leaves, stems, and roots, and either eat or store them. To preserve the garlic, store the bulbs in a cool, dimly lit place with good air circulation. The temperature should hover around 60 to 65 degrees F. Do not place the bulbs in an airtight container or plastic wrap. That will promote rotting. Instead, place them in a mesh bag or an open paper bag.
Favorite Garlic Recipe for Aioli Pasta Sauce
The following is a recipe handed down to me by my husband’s aunt. It’s delicious if you enjoy lots of garlic and anchovies!
Ingredients:
-
2 cans flat anchovies in olive oil
-
olive oil
-
3 cloves garlic
-
black pepper
-
angel hair pasta
-
parmesan cheese
Directions:
-
In a 5 inch diameter pot, pour a thin layer of olive oil to cover the bottom.
-
Chop up 3 cloves of garlic.
-
Add the garlic to the olive oil under a low flame until the oil is infused with the garlic. Allow the cloves to turn slightly brown.
-
Turn off the heat and cool the mixture.
-
Add one inch of water to oil and garlic.
-
Add two cans of anchovies including the oil to the mixture.
-
Bring the mixture to a boil, then turn off the heat. The anchovies will break up into tiny pieces.
-
Season to taste with black pepper.
-
Add a little water if it’s too oily (however, I never do).
-
Serve over angel hair pasta and add parmesan cheese.
Enjoy! This is a wonderful dish to include in the Feast of the 7 Fishes if you celebrate an Italian Christmas Eve.
Final Thoughts/ How to Grow Garlic From Bulbs
It’s really rather easy to grow your own garlic from bulbs as long as you buy the proper bulbs and time it right. Using organic garlic bulbs and following the steps above, I have no doubt you will soon be enjoying your own crop of delicious garlic!
I hope you enjoyed this article. Read my post on how to grow garlic indoors and in pots, and learn the many health benefits of eating garlic.
Please leave a comment below and share it with other garlic loving friends and family!
For more information on herbs, check out Planting Herbs in a Garden.
