
How to Care For a Fiddle Leaf Fig Plant
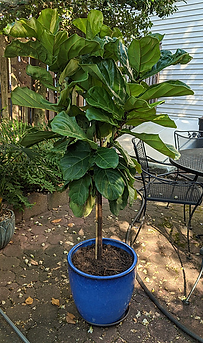
They were all the craze, those Fiddle Leaf plants. But for the last year or so their popularity has waned and they have been replaced by some new and improved plant. However, they haven’t with me or with my son! We both recently bought a Fiddle Leaf. I bought one for my daughter as a housewarming gift. It came in one of those nasty plastic containers so, in order to make it look extra pretty, I purchased a lovely pot that complemented her decor and repotted it.
The plant was quite difficult to repot. Its roots were so entangled that I could not lift the ball from the pot and after doing so the roots were quite difficult to untangle. Read on
to learn how not only to repot one but how to care for a Fiddle Leaf Fig plant.
(Some of the links within this post are affiliate links on which I receive a small compensation from the sale of certain items with no extra cost to you.)
(As an Amazon Associate I earn from qualifying purchases.)
First Things First – Repot the Fiddle Leaf
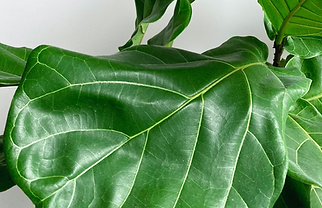
Fun Fact!
The Fiddle Leaf Fig is called this because the shape of its leaves resembles a fiddle!
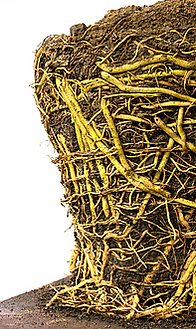
When you purchase any new plant, you should repot it in a pot approximately 1 to 2 inches larger in diameter than its existing pot. The plant I purchased had roots entwined in a tight circle which were visible at the top of the pot. For the majority of plants, if left in this condition, the roots would continue to grow and eventually strangle the plant. However, a Fiddle Leaf Fig plant likes its roots to be somewhat compact so its not advisable to transplant it into too big a pot.
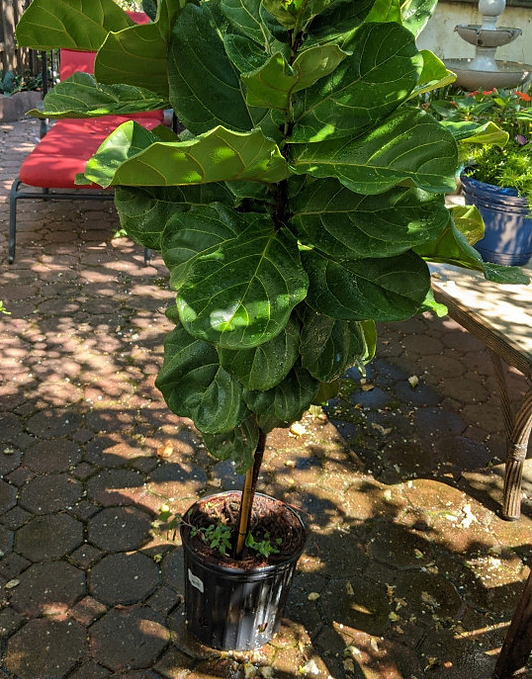
This particular plant was also very large and top heavy and needed to be transplanted into a more sturdy pot. When selecting a pot, choose one with a drainage hole.
Sometimes you have to cut a plastic pot with a utility knife in order to release the plant. This is what occurred when I tried to repot my plant. (If you’re lucky the ball of the plant can be easily removed by leaning the pot on its side while holding the stem, and banging the outside of the pot with a trowel to loosen the roots. I wasn’t so lucky.) Once free, I carefully untangled the roots allowing them to fall out of the soil. You may have to cut some of the tangled roots in order to help them unravel. No need to untangle them too much, for they like feeling somewhat squished together.
Soil Requirements
Fiddle Leaf Fig plants are native to rainforests of western and central Africa. It’s soil should contain the same ingredients as a rainforest, which consists of a nutrient rich blend of perlite, coco coir, and organic material. A good indoor houseplant mix will enhance the growth of a Fiddle Leaf Fig plant. Indoor potting mix drains quicker than outdoor potting mix, yet retains enough water because of the perlite that is added to the organic mixture.
Water Requirements
Fiddle Leaf Fig plants like to be kept consistently, evenly moist with a brief drying out period between waterings. I have an inexpensive moisture meter that quickly tells me whether or not my plants need watering. Just stick the probe into the soil at least 4 inches deep and half way between the trunk of the plant and the edge of the pot and read the meter. If your plant is dry, give it a good, slow, thorough watering until the water seeps from the drainage hole. Use the probe on the meter to break up any hardened soil on top to encourage better drainage throughout the soil.
Ways to Water Plants
1. Bathtub
Stick the plant, pot and all, in a bathtub filled with tepid water about half way up the side of the pot. Allow it to absorb water from the bottom drainage hole for 35 to 40 minutes. You may have to force the plant down into the water until all air bubbles have left the soil.
Drain the tub and keep the Fiddle Leaf there for 15 or so more minutes, allowing the water to drain from the pot. You now have a thoroughly watered Fig plant.
2. Plastic Container
Stick the pot inside a large plastic container. Water the plant from the top directly into the soil. Once water starts seeping from the drainage hole, fill the plastic container with water so the level of water covers the bottom of the pot.
Keep the plant in the plastic container for approximately 30 minutes to allow for a thorough watering from the roots up.
3. Old Fashioned Watering Can
Fill a watering can and gently water the soil, not the leaves, until you see water released from the drainage hole. Be sure the soil is granular and in pieces. After time soil will harden. When water hardened soil, the water will drain to the edge of the pot, flow down the path of the pot to the drainage hole, and not reach any of the roots. To avoid this, before watering break up the soil with a screwdriver, skewer, stick, chopstick or anything that is stiff and will penetrate the soil.
How Often Should You Water a Fiddle Leaf Fig Tree?
There are different ways to decide when to water your plant.
1. Stick your finger two inches into the soil. If it comes out dry, give it a watering.
2. Use a water meter to determine its moisture level.
3. Look at your plant. If its leaves are droopy, it needs water.
4. Stick a chopstick way into the soil, leave it there awhile and then “read” the level of the water once you pull it out. Similar to checking the oil level in your car with a dipstick! If the chopstick is mostly wet, do not water the plant.
TIP:
Fiddle Leaf Fig plants do NOT like to be watered frequently. These plants often die due to overwatering or lack of adequate sunlight.
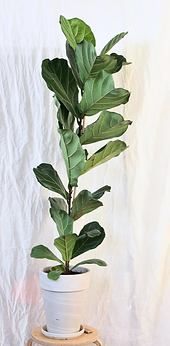
Well watered Fiddle Leaf Fig plant to the left. Its leaves are open and spread out.
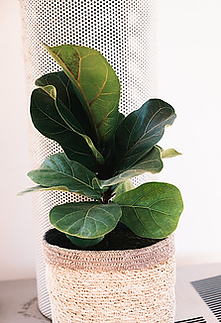
Fiddle Leaf Fig plant that needs to be watered to the right. The leaves are tucked in closely.
Light Requirements
Place the Fiddle Leaf Fig tree in a southern or western facing window. It thrives in a warm, humid environment filled with plenty of sunlight. You can place it directly in front of the window. Do not place it in close contact with a heater or air conditioning vent. If it’s leaves are flapping from the air of a vent, move it. An eastern facing window will suffice too, so long as the area is very bright with sunlight.
If the Fiddle Leaf is in direct full sun the entire day, its leaves may get sunburned. In this case, place a sheer curtain between the plant and the window or place it 3 to 4 feet back from the window.
Do not place it in a northern facing window. It will not do well there from lack of sunlight.
Fertilizing
Like all indoor plants, they should be fertilized from the spring until the fall in one month intervals. Use a good organic houseplant fertilizer and follow the instructions for dilution and administration.
Troubleshooting
Dropping Leaves
When you first bring home a Fiddle Leaf Fig, your plant may drop some leaves. Don’t worry, it is just acclimating to its new environment. It will take 2 to 3 months to get fully accustomed to your home. If it continues to drop leaves, it is probably due to too much watering or not enough light.
Brown Spots and Dropping Leaves
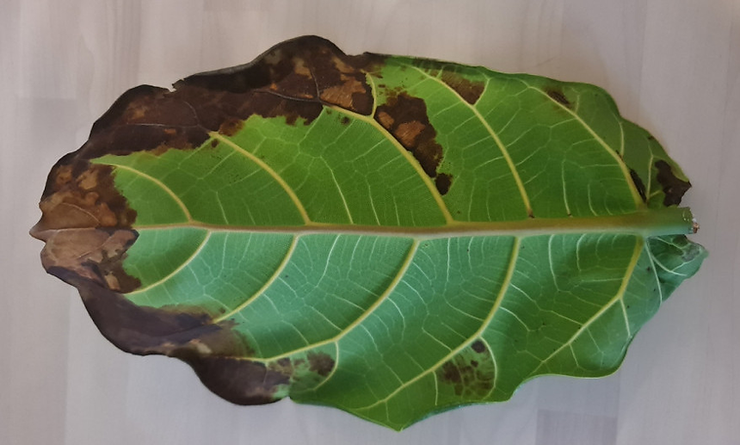
1. The plant may be getting too much water. Although their leaves are quite thick and large to absorb a lot of moisture, Fiddle Leaf Figs do not like to live in soggy soil. If you soil is soggy, allow it to dry out completely before rewatering.
2. If the plant does not receive a lot of sun, the leaves will start dropping. The Fiddle Leaf Fig needs a lot of light to create energy, so be sure it is properly placed in your home. Try moving your plant closer to sunlight and see if this helps.
3. Underwatering is also a big killer of Fiddle Leaf Figs. The rim of the leaves will begin to curl in and turn brown. Eventually this condition will extend throughout the entire leaf and it will fall off. Be sure to use one of the methods above to determine whether your plant needs to be watered.
The Leaves Look Sunburned
When the leaves have a tinge of brown crossing over them but not in any particular shape, they are probably sunburned. If this is the case, the plant is getting too much direct sunlight. Pull it back from the window or place a sheer curtain on your window.
When to Repot a Fiddle Leaf Fig Plant
Repotting should be done in the spring or summer. If you’d like your plant to grow taller, repot it into a slightly larger pot, 2 to 4 inches more in diameter than the original pot. This should be done every 18 to 24 months. Do not go too large because it will not grow as well.
If you’d like to keep your plant the same size, repot it into the same pot. However, you must trade out the old soil with new, nutrient rich, indoor potting soil and trim away some roots and foliage.
Once you notice the roots encircling the outer edge of the pot or masses of roots coming out of the bottom, it is time to repot your plant even if you want to maintain its current size.
For more information on indoor houseplants, click here.
Final Thoughts/ How to Care for a Fiddle Leaf Fig Plant
Having a new plant in your home is like having a new pet or infant. Like pets and infants you need to care for them through trial and error before you find the perfect solution.
Be sure to place your plant in the correct sunlight. If you begin to see some sunburned leaves or it is just not looking right, tweak the placement. You will eventually get it right. Remember they take a while to acclimate.
If your plant is droopy, has brown spots, or curling leaves, check the water level in the soil. Follow the directions above for water and remember DO NOT over or underwater your new “baby”.
Through fertilizing and supplying your plant with a good organic potting mix, you will soon be delighted with the growth of your new plant. Take your time, be flexible and patient, and don’t forget to care for your plant! You and it will become close roommates before you know it!
I hope you found this blog interesting and worthwhile. Please share it with others and leave a comment below. I’d love to hear from you!
Happy Gardening