
How To Care For Indoor Plants – A Little Goes a Long Way
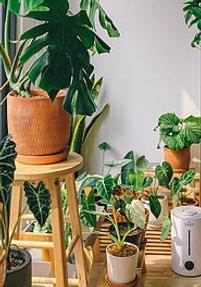
Indoor plants bring such joy. There is something about nature inside your home that makes you feel serene and healthy at the same time. Caring for the plants is also very therapeutic. In my last post I explained some things you need to know as a beginner gardener about household plants, including plants to avoid if you have a pet dog or cat. This post will cover basic needs and how to care for indoor plants.
(Some of the links within this post are affiliate links on which I receive a small compensation from the sale of certain items.)
Best Soil For Your Plant
You’ve purchased your desired plants, perhaps purchased some new pots, brought them home and are now ready to repot the plant. So which soil should you use? You may think the topsoil in your yard is good to use for your plants. However, this soil is very heavy and does not supply the proper aeration for the tender plant. It can also contain organisms that are harmful to your plant and also unwanted seeds.
Therefore, it’s best to purchase potting mix which is exclusively created for indoor pots. It provides the proper aeration, moisture and nutrients required to grow a healthy plant. It usually consists of perlite, vermiculite and peat moss which prevents it from compacting. If the soil is too compact, the tender roots will not be able to penetrate the soil. Potting mix is also sterile and does not contain any diseases or fungi.

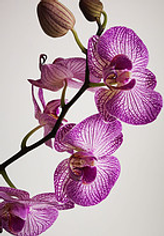
If you choose to repot an orchid or violet, there are specific potting mixes for those types of flowers. They sell these at Lowes, Home Depot, or online.
If your desired plant is a cactus, supply it with pebbly, sandy, porous soil with a little organic material thrown in to provide excellent aeration and nutrients.
Potting mix can expire. It usually lasts between one to two years so you will have to either rejuvenate the soil or buy fresh mix and
repot your plant. You can tell it has expired by:
- looking at the expiration date
- checking for white speckles or dust (please do not put your head too close to the bag) which is probably mold
- seeing if there are tiny fungus gnats in the soil
- it has a bad rotten egg smell caused by bacteria growth
If you like to DIY, here is a site that explains how to make your own potting mix. I personally do not have the space or the time to do this, but many people like to do this, so enjoy! Please follow their safety precautions.
Time To Fertilize The Plants
There are many forms of fertilizer. Plant food spikes, liquid all-purpose plant food, granular slow release fertilizer, liquid seaweed and kelp food, water soluble fertilizers and even earth worm based food.
Miracle Gro has a variety of fertilizers including some that are specialized for different plants, such as orchid and violet food and a food for cacti. Most all purpose fertilizers are given once a week during the growing period (spring and summer).
You can select any variety, whichever one suits your lifestyle. For instance, the liquid all purpose plant food has to be given during specific times, so unless you are good at scheduling, this one may not be right for you.
The granular slow release fertilizer and plant food spikes are more convenient for those who tend to forget to feed their plants, like me. This may be a better choice for you.
Check to see if the fertilizer is organic. Remember, we want to be good to our environment so choose wisely.
You can even create your own fertilizer. It is easy to do and is much cheaper than purchasing high end fertilizers every so many weeks. Here is a recipe from Bob Vila, a residential and design architect entrepreneur who expanded his business into gardening. He is also a great humanitarian who worked with the Peace Corp, Habitat for Humanity and for years with the National Alliance to End Homelessness…..just to name a few!
What You’ll Need:
- 1 Gallon Jug
- Household ammonia – contains nitrogen which promotes healthy root growth
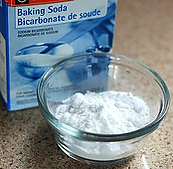
- Baking soda – helps reduce fungal disease and promotes blooms in flowering plants
- Epsom salt – contains magnesium which helps the plant produce chlorophyll and sulfur which helps absorb the nutrients
Directions:
1. Measure 1 ½ tablespoons of Epsom salt into a clean gallon jug. A rinsed-out plastic milk jug with its lid makes a great container for this homemade plant food.
2. Add 1 ½ teaspoons of baking soda to the jug.
3. Measure slightly less than 1/2 teaspoon of ammonia into the jug. Ammonia goes a long way so make sure it is the correct amount.
4. Fill the rest of the jug with plain tap water, screw the lid on tightly, and swish well to combine.
5. Let sit for at least 30 minutes to allow the Epsom salt to completely dissolve. Label the container and store it in a cool dry spot.
Be sure to store the solution away from children and pets. Ammonia is toxic.
The fertilizer is ready to go. Fertilizer your plants every 3 to 5 weeks in the summer and every 5 weeks when plants grow dormant in the winter. Use the same amount of fertilizer as if you were giving them a normal watering.
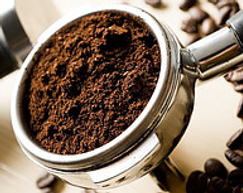
One last thing, if you want to add coffee grounds to your plant, do not add them directly to the soil. It could impair the plant’s growth, retain too much water, and cause fungal growth. Instead, compost the grounds and after they are fully “cooked” apply them to the soil.
Pruning, Grooming, Thinning and Turning
As your plants begin to grow, you will notice they may become a little thin or straggly. It is time to prune your plant. To prune just means to “give it a haircut”! Remember, you want to achieve a natural look so cut the long stem above a leaf node; a node is where the leaf and the stem come together. This is where new growth will begin to grow. Do not be afraid to trim your plant. It will thank you for it by growing back more full and lush.
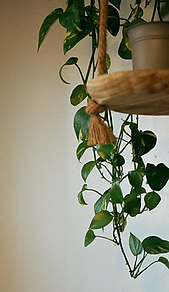
If your plant is dying out in the center, thin it out by cutting the dead stem from the base of the plant next to the soil. In addition to nutrients, sunlight and water, the plant thrives on air so this will allow more air to touch the leaves and prevent fungus and mold from growing. You may want to thin out your plant if it is just a little shaggy. In other words, give it a good haircut.
Pull off dead leaves and/or dead flowers and stems. Wait until the stem has turned completely brown before removing it. With violets, be sure to look underneath the bottom leaves. There are usually dead ones decaying there. Remove them before they contaminate the soil.
Be sure to turn your plants. They will grow towards the sunlight, so in order to create an even growing pattern, turn them when they appear to be tilting a bit.
Be sure to water them regularly or as needed. You’ll have to look up the water and sun requirements for each indoor plant in order to place them in the proper spot in your home. Refer, again to my previous post to help you decide the best place to house your plant.
For more information on indoor plants and pet compatibility, check out All About Indoor Plants.
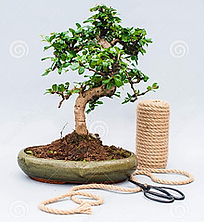
Propagation – Let’s Make Some Magic!
To propagate a plant is a natural process that reproduces the plant from the parent plant using a cutting; a leaf, stem, etc. Plants can also be propagated from their seeds, or other plant parts. Another name for this process is “rooting” a plant.
You can keep creating new plants without the hassle or expense of buying plants.
There are four techniques for propagating indoor plants:
- stem cuttings
- leaf blade cuttings
- side cut shootings
- leaf vein cuttings
Here is a video easily explaining how to propagate plants using each method above
Water Systems For Your Indoor Plants
You now have wonderful indoor plants but it’s time for a vacation. So how are you to keep your plants alive while you’re away? There are many products you can buy to automatically add water to your plants. Listed below are just a few.
In addition to products there are some home remedies you can implement.
Products to Purchase
(“As an Amazon Associate I earn from qualifying purchases”)
Blumat Automatic Water System for 5 plants – It requires no batteries or electrical power. It can be used for indoor plants, patio containers, hanging baskets, or raised beds. The system is self watering and has an easy set up. (This product may be unavailable on Amazon; try googling it’s name to find another source.)
Self Watering TerraCotta Spikes – The TerraCotta is very porous since it is made of clay, so water inside the spike slowly wicks out into the plant. Gently stick the spike into the soil with an attached water or wine bottle. Once the clay has absorbed the water, it slowly releases the water into the plant. One liter of water should water your plants from 7 to 10 days.
Automatic Drip Irrigation Kit – This system has a varied programmable device for watering every day, every other day etc. for as many seconds as you like. It will water from 1 to 10 plants.
==<Click Here For A Review Of Automatic Drip Irrigation Kit>==
Home Remedies
Home Remedies
Before trying these remedies, be sure to water your plants as you normally would before leaving on vacation. Then set up one of the following systems.
Place a towel in a sink or tub. Fill your sink or tub with a few inches of water and place your pots inside. The water will be drawn up into the roots. This will keep your plants watered for up to one week. However, make sure the plants are in a sunny area. If your bathroom has no windows, this process will not work since plants need sunlight for photosynthesis to occur.
You can use a polyethylene plastic bag to cover your plants. It acts somewhat like a terrarium. Air goes through the plastic but water will not. As the water evaporates it is collected on the inside of the bag and drips back down into the soil. Place your plant in indirect sunlight and blow a little air into the bag before sealing it. Try not to let the bag touch the leaves by placing small stakes into the soil.
Use the water wicking method. Place a large cup of water next to a plant and extend a long piece of cotton clothesline from the water to the plant. Push the clothesline at least 2 to 3 inches into the soil of the plant. The line absorbs the water and transfers it to the soil.
Use a DIY drip system. Drill small holes into a water bottle close to the top. Add water to it, close the lid, turn it over and place it about 2 inches into the soil so the holes are submerged. Do not place it too close to the plant. Water will slowly drip into the soil. For larger plants, use a larger bottle.
When leaving on vacation, it is also best to group your plants together so they can benefit from the moisture that is given off by each plant.
Be sure you check the water requirements for each plant. You will NOT want to add a water system to a cactus!
Loving Your Indoor Plants – Conclusion
I hope this post did not scare you off of the idea of caring for your indoor plants. It’s really not that difficult to care for them. Just remember to water, trim, feed, and sun your plants. The other things suggested in this post are just added bonuses to the fun you can have when considering how to care for indoor plants.
Please leave comments below. If you have any questions, I’ll gladly answer them.
Happy Gardening!
Nina
bestgardeningforbeginners@gmail.com