
Preparing Soil For Gardening – All Soil is Not Created Equal
So you have decided to create a garden. Woohoo! I hope you have read my previous blogs because they will help you with the fundamentals of gardening. Todays blog is going to touch upon various kinds of soil and preparing soil for gardening. The soil is “food” for plants and we want to make sure they are being fed highly nutritious ingredients along with superior minerals. It is best to know what kind of soil you have in your yard before planting flowers. All soil is not created equal.
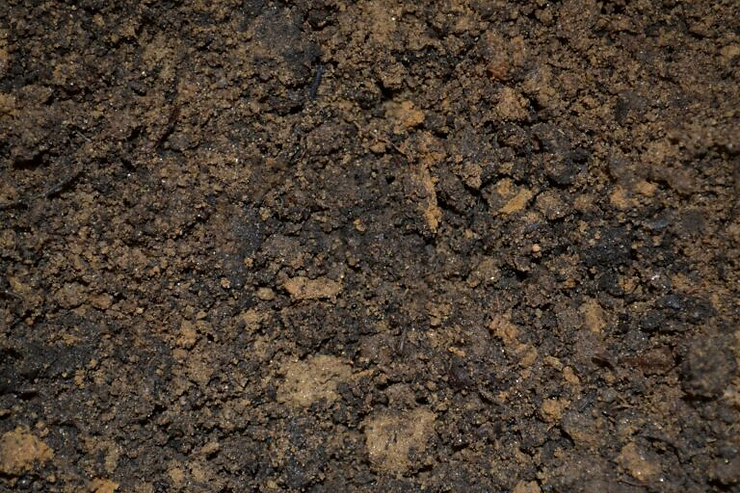
Types of Soil – Let’s Get Down and Dirty
There are 3 basic kinds of soil and where you live usually determines which type of soil is found in your yard.

1.Sandy Soil
If you live in a coastal area or a desert, you probably have sandy soil which tends to be acidic and low in nutrients because it drains very easily. It feels rough upon touching and is grainy and the particles are quite large. Some flowers that like sandy soil are bearded iris, salvia, and sedum just to name a few.

2. Clay
Have you ever seen cracked soil when it is very hot outside? You can probably count on this being clay. Clay particles are very tiny and stick closely together. As a result, clay is less porous than sand and can almost create a barrier which prevents water from sifting through. Clay has many more nutrients than sand, but because it does not drain well at all, it will be very heavy and cause your plant’s roots to rot from too much water. Clay can usually be found around ponds or streams. It is probably clay if the ground you are walking on is slippery after a rain, and if you can form a ball by just squeezing a handful of dirt. Asters, bee balms and daylilies enjoy a clay diet.

3. Loam
When walking through the woods, you most likely see bits of leaves, twigs or other organic things decomposing on the floor. This decomposition of organic materials creates loam. This type of soil provides the best soil for most plants because it is chock-full of nutrients and minerals and it drains well. However, plants are fickle so you have to know which type of “food” your plant likes to eat.
Usually your soil is a combination of these materials, so which type of soil do you have?
Prepare the Plot – For a Garden That Is!
If you have read my previous blog, “Gardening Ideas for Beginners – I think I Can!“, you’ve probably decided on the location of your garden. If you’re lucky, it is just a small plot of land covered with dirt. However, if you’re not that lucky and it’s covered with thick, lush, grass, preparing soil for a garden involves a little more muscle. Here are some suggestions for preparing soil for gardening:
- rent a sod cutter at your local garden store to remove the grass
- lift the grass with a shovel, but first water it well to make it easier to lift. Be sure to dig down 3 to 4 inches to include some of the root system.
- place layers of corrugated cardboard and/or layers of newspaper over the plot to kill the grass. This will usually take 6 to 8 weeks for it to fully decompose, so it’s best to start either late winter or early spring.
- hire someone to remove the grass and amend it with nutrients
In order to visualize the garden, use a can of spray paint to outline the area or stake it out with rope. The design depends on your individual preference. I like curves, so every garden I have created is quite curvy!
Loosen the Soil – Allow the Roots to Thrive
After you have successfully removed the grass and/or weeds, you will need to till the soil. Tilling the soil aerates it (creates air pockets) and makes it easier to alter the composition by adding nutrients to your dirt. Make sure you till the soil when it is moist. That will make for an easier job. There are a few gardening tools you could use to till an area of ground.
(As an Amazon Associate I earn from qualifying purchases.)

- Cultivator – is a mini-tiller used to cultivate soil only. It is not conducive for removing grass or weeds because grass and weeds will get wrapped around the tines. The tine depth is 4 to 10 inches deep with a 6 to 16 inch tilling width. It’s light-weight which makes it easy to use for a small area and the tines propel it forward for easier use. They are either gas or electric powered. (Amazon)
- Garden Tillers – these are more powerful machines and are usually gas powered. Their tines can be located either in the front, middle or rear of the machine. When the tines are in the front, it’s the easiest operation and meant for softer loamy soil; if in the middle the machine actually is the easiest to maneuver and will perform a lot of the operations a rear tine tiller will do, but it’s less common to find; rear tine tillers are more heavy duty and can till new ground with heavy dense clay
- Pitch Fork – this is the old fashioned way of turning soil and is very functional if you have soft soil
Time to Make a Change – Amend the Soil
Now that you’ve cleared the grass and weeds and tilled the soil to a depth of 12 inches, it’s time to amend the soil. Preparing soil for gardening can be as easy as adding some sand to your soil to make it less heavy and dense. But you will want to seek a pro’s advise regarding how much and what type of material to add to the soil. Use a soil tester to determine what your soil is lacking. Usually you will just have to add some lime to adjust the pH or add some compost bought from your local garden store.
Creepy Crawlers
One other natural way to make your soil rich and fertile is to add worms to your plot of land. You simply purchase them at garden centers or Lowes or Home Depot and put them on your garden on a dry day and the worms will dig down to find moisture in the soil. Once they are comfy they will reproduce and aerate and fertilize your garden for many years.

Change is Good-Preparing the Soil
So as you have learned there are many types of soil. This blog touched on the three basic forms of soil. As a novice knowing these three types is essential to effectively preparing soil for gardening. Once you have identified your soil, you can use organic additives to enhance the growth of your plants. Enjoy getting dirty!!
I’d love to hear your feedback. Leave a comment!
Happy Gardening!
Nina
bestgardeningforbeginners@gmail.com
www.bestgardeningforbeginners.com