
Preparing Indoor Plants To Come Inside For Winter – Easy Peasy
It’s the time of year to start preparing your indoor plants that were put outside to come indoors for winter. When the low temperatures consistently reach 50 degrees F (generally during late September, early October), you need to bring them inside to acclimate them to your inside environment before you turn on the heat. In order to ease the transition, follow the easy steps below.
(Some of the links within this post are affiliate links on which I receive a small compensation from the sale of certain items with no extra cost to you.)
(As an Amazon Associate I earn from qualifying purchases.)
1. Prep Inside
Many people think about this step after they’ve already prepped their plants. However, this should be done BEFORE you prep your outside plants.
Wash Your Windows
This allows for maximum light to reach your indoor plants.
Clear Space On Your Window Sills
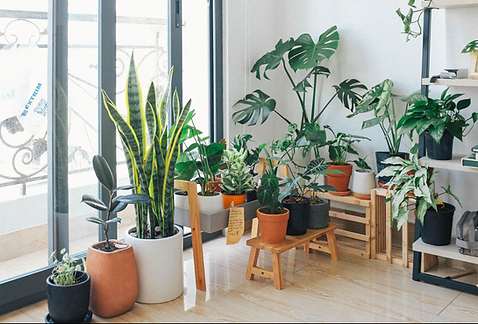
Purchase New Plant Stands if Needed for Indoor Plants
Purchase and/or Inspect Saucers
How many times have you placed a plant on a clear saucer only to have water leak from the bottom? Prevent this from happening by pouring water into the saucer and seeing if there are any leaks.
Add Ceiling Hooks if You Are Hanging Indoor Plants
Buy Indoor Plants At Fast Growing Trees
2. Give Plants A Hair Cut
Shifting your plants from outdoors to indoors will send your plant into shock. Therefore, cut back your plant to two thirds its size to help it adapt more easily to its new environment.
Use shears that have been wiped clean with rubbing alcohol. Then trim off any dead or damaged leaves and stems, and any diseased parts of the plant.
Remove any debris from the top of the soil in the pot.
3. Clean The Outside of the Pot
Using a mild solution of dishwashing soap and water, clean the outside of the pot with a cloth. Be careful not to let any solution enter the soil.
4. Repot If Needed
Before you bring in your plants, check to see if they need repotting. If the roots are growing out of the pot at the drainage hole or at the rim, or you cannot easily stick a finger into the soil, chances are you need to repot.


Remove From Pot
Begin by gently pulling the plant out of the pot. You may have to slide a trowel or blunt knife down the inner side of the pot to loosen the roots that may have attached themselves to the pot.
Untangle Roots
While untangling the roots, gently remove as much soil as you can from the roots.


Disinfect the Pot
Disinfect the pot by placing it in a solution of one part household bleach to 9 parts water for a minimum of 10 minutes. Then wash it with a solution of mild dishwashing detergent and water. To remove mineral deposits and other debris from a clay pot, use a wire-bristle brush or steel wool.
Add Soil
After the pot is clean, place a stone over the drainage hole to prevent soil from rushing out. Add appropriate soil to a depth of about one quarter full of the pot’s height and hold the plant by the base allowing the untangled roots to dangle in the pot. With one hand holding the plant at rim level, add more soil and gently push it down between the roots with your other hand. Continue doing this while rotating the pot until it is full with patted down soil.
Water the Plant
Gently water your plant on an easy “shower” selection of a nozzle or with a sprinkling watering can until water drains from the hole at the bottom of the pot.
5. De-Bug the Indoor Plant
If you are not repotting it, it’s best to rid your plant of any unwanted insects before bringing it inside.
Soak the Container
Drown all insects from the soil by placing the entire container (be sure it has a drainage hole) into a large tub filled with lukewarm water. Submerge the entire pot to above the soil line.
Let it sit for approximately one half hour. This will force any soil dwelling insects to float to the surface.
Skim off any bugs or debris floating on top of the water.
Brush off Leaves
Using a one inch flat brush (found in home or craft stores), sweep off any cobwebs on top and below the leaves. Also brush off the stems of the plant.
Spray Leaves for Insects
Check for any aphids, mites, or any other small insects that may be attached to the leaves and stems. Spray your plant with the following solution:
Combine in a mister bottle:
- Squirt of dishwashing liquid (such as Dawn)
2. Add a couple of drops of essential soils such as mint or eucalyptus
3. Add approximately 2 cups of water into solution
===<Purchase Essential Oils From Etsy>===
Spray the entire plant making sure to cover the underside of the leaf.
Allow it to dry for about 20 minutes.
If you see you have a few persistent insects, spray the plant with the solution each day for a week. If the infestation persists and the plant is infested with insects, you do not want to bring it inside and you may have to throw out the plant. Do not put it in a compost pile because you do not want to infect your good organic material.
Top Off Soil
Once you have completed these steps, top off the soil with some extra indoor potting soil and fertilizer to ensure your plant has the best ingredients to survive the transition from outside to inside.

6. Begin the Transition
It’s now time to slowly acclimate your plants to their new environment. Begin by bringing them onto an enclosed porch if you have one. Keep them away from drafts. Place them where they will get as much natural light as possible and keep them there for a week. Then follow the steps below.
If you do not have an enclosed porch, place them inside as close to a window as possible, preferably one that receives bright sunlight.
After keeping them by a sunny window for a few days, gradually move them away from direct sunlight to a more low-lit area. Check the amount of sunlight your plant should receive and, finally, place them accordingly.

7. Care For Your Indoor Plants
Continue to care for your plants according to the type of plants they are. For more information on indoor plants, check out All About Indoor Plants – Info for Beginners and Pet Lovers, and How to Care For Indoor Plants – A Little Goes a Long Way.
Preparing Plants To Come Indoors For Winter
Following the above steps will almost guarantee success in transitioning your plants from outside to indoors. Remember to prepare the inside of your home, give your plants a haircut and trim, repot them if needed, de-bug your plants, do a proper transition, and continue to care for your plants inside.
I hope you enjoyed this post and will share it with others. Please leave a comment below and let me know how you made out.
Happy Gardening,
Nina