
How to Decorate a Window Box for the Fall

I love window boxes. They add charm and interest to any house. In the fall when the summer blossoms begin to fade, the boxes begin to lose their beauty. Though, no need to fret! You can easily recreate your window box into a lovely fall display using clippings from your own yard.
If you do not have a big selection to choose from in your yard, ask a friend if you can use some of their clippings. Or perhaps you can do what I did this past weekend. I went on a nature ride, stopped alongside a country road, and clipped some beautiful grasses, wildflowers, and branches of changing leaves. Disclosure: Only do this if it is legal in your area!! Read on to learn how to decorate a window box for the fall.
(Some of the links within this post are affiliate links on which I receive a small compensation from the sale of certain items with no extra cost to you.)
(As an Amazon Associate I earn from qualifying purchases.)
Step 1 – Go Foraging
Collect anything that looks like it will hold up for a few weeks or through Thanksgiving. Here are some suggestions:
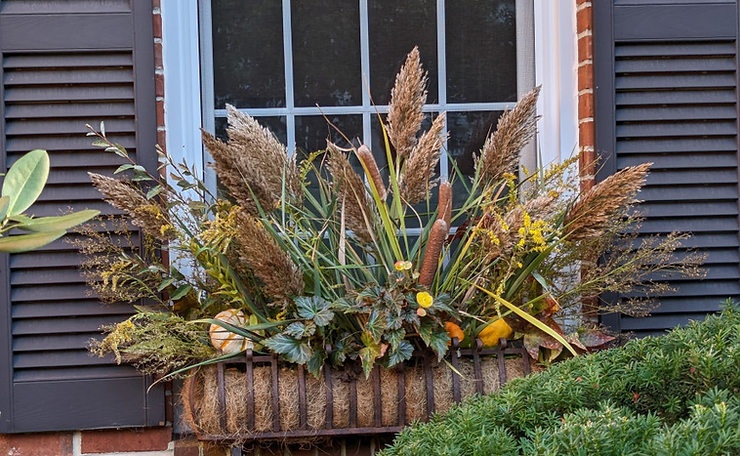
- Cattails (or as I call them, punks)
- Tall grasses with their plumes
- Long stems of flowers with seed pods

(TIP: Do not cut stems of flowers with seed pods in your garden in the fall if you are not repurposing them; wait until spring. Birds will eat the seeds throughout the winter.)
- Branches of long lasting leaves such as oak and maple trees
- Clippings from evergreen shrubs or trees
- Pine cones
- Branches of fruit trees with berries
- Sprigs of native flowers or bushes in your area such as Golden Rod, Brown-eyed Susan, Verbena, Purple Prairie Clover, etc. For a variety of fall flowers including pictures, click Native Wildflowers and Seeds.

For one large window box, you’ll need approximately 10 to 12 sprigs of each item you will use. Also, cut them about 2 and a half feet long. You will cut them to size when you assemble the box.
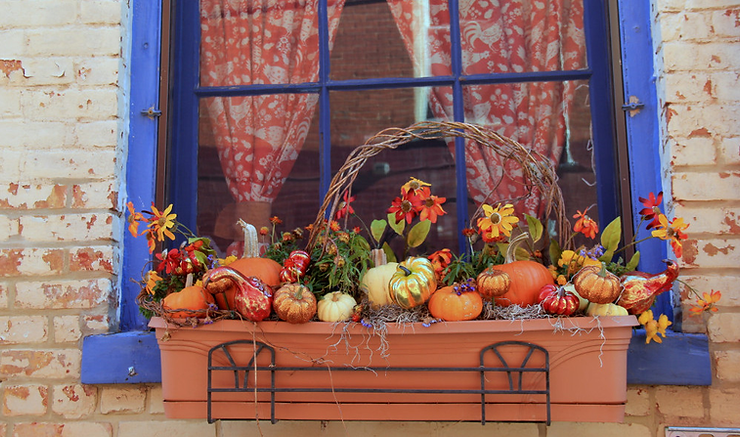
Next, go to a local farmer’s market and purchase some small gourds and miniature pumpkins and perhaps one small sugar pumpkin to use as a focal point in the center of the window box.
Shop Etsy for Cattails and Other Fall Ornaments
Step 2 – Divide and Conquer
(If you have not already done so, pull out any summer flowers from the window box leaving the soil intact. Thoroughly water the soil.)
Divide the treasures in each group.
All of the similar items should be aligned with the tops pointing up and the bottoms pointing down. This will make it easier to grab an item when you are designing your window box.
Step 3 – Basics For Placement
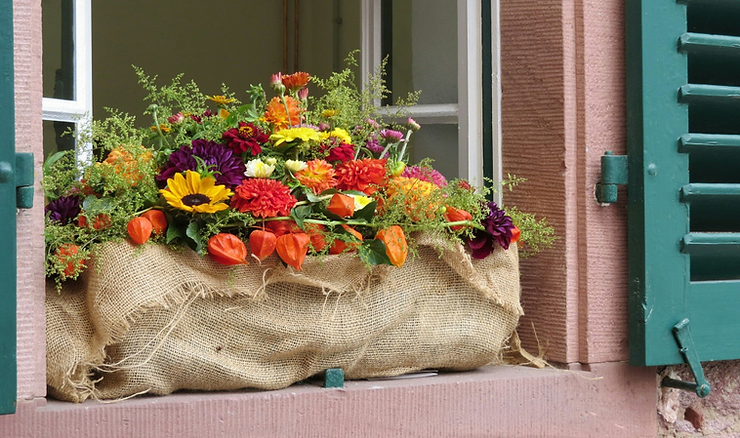
Typically, when you arrange flowers in a window box for the spring or summer with live plants, you have three basic elements; a thriller, a spiller, and a filler.
A thriller consists of the focal point which is the most splendid piece in the box. It will drive the rest of the design of the box as far as color and texture.
Spillers add a little whimsy to the box. These types of plants gracefully fall over the sides of the box and add a little softness to the design.
The filler adds fullness to the box and solidifies the areas between the thriller and spillers.
TIP:
When selecting the plants for spring and summer window boxes, take into consideration the sunlight and water requirements. All selections should require the same elements.
This post will not be using live plants, but items you find in Autumn settings.
Basic Design Elements For Planting a Window Box
When using dried elements or some that will survive regardless of water or sunlight requirements, you can still use the above directions. In addition to thriller, filler, and spiller, keep in mind a few basic principles when decorating window boxes.
Choose a Focal Point
The centerpiece, or the thriller, will dictate the other elements you choose for the box which will help unite the look.
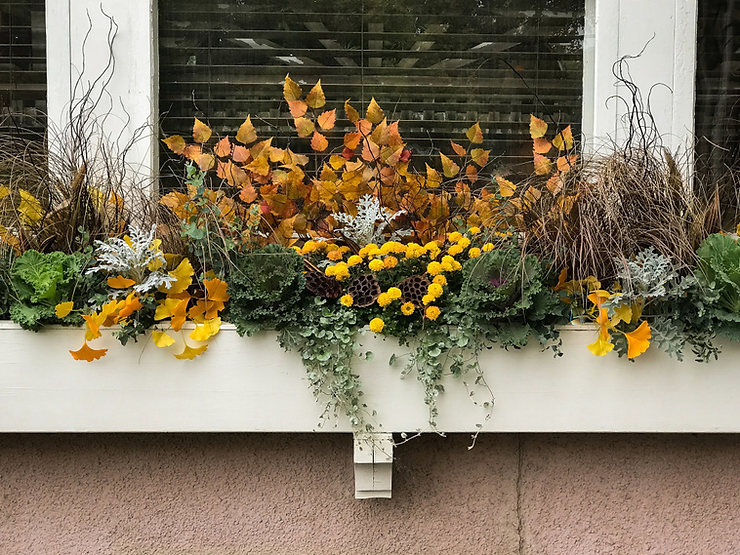
Your focal point can be a sugar pumpkin, a winter cabbage, celosia, or cockscomb, just to name a few. A croton or a small grass can be an interesting centerpiece. Winter pansies will also work for a focal point and will extend the life of the box into the next season.
Consider Texture
Combining wispy grasses with soft maple and/or oak leaves and more textured croton plants will create a window box that helps spotlight each item. One element will not overpower the others. Instead they will complement each other.
Use Repetition
By repeating elements and using symmetry when placing the twigs into a box, you will create cohesiveness.
Take Cues From the Landscape and Surrounding Structures
If you have a Japanese Maple in the yard, add elements with the same hue. Should your front door be yellow, then select yellow goldenrod or grasses of the same color.
Stay Consistent
If you have multiple window boxes surrounding your home, stay consistent with the themes. The front yard boxes should blend well with the same hues, as should the back yard window boxes.
Consider Form
This is where your creativity comes in.
Do you want the final product to look like a half moon? Or perhaps you’d like the center to be the tallest spot and the sides shorter. How about 2 peaks on the left and right with fillers in between? Let your imagination run wild but have a plan before you begin adding the elements or you’ll find yourself tearing them out and starting all over again.
Symmetry is Key
Even if you decide on a form that is not centered, you will still need some symmetry surrounding the focal point to create a cohesive look.
After considering the suggestions above and collecting the stems and centerpieces, separating them, and preparing the window box, it’s time to put it all together.
Basic Elements for Decorating Window Boxes
You can either work with the window box where it is attached to your home, or remove it from your house and place the box on a table.
While you are creating your masterpiece, you will be using sharp hand cutters to clip the stems to the proper length. Remember to cut each stem on an angle so the stem can absorb more water. The proper size will depend on how far you would like the stems to extend out of the box.
Directions for creating a fanned out, symmetrical window box
1. Add the focal point in the center of the box.
2. Surround the focal point with a bushier stem, such as plumes of grasses, at a 45 degree angle out from the center; add a few fanning up and out like the tail of a peacock.
3. Add the filler pieces of golden rod, colored leaves, or other stems and place them on an angle between the plumes, making the box look full.
4. Add 2 or three cattails as a grouping on one or both sides of the focal point either pointing straight up or at an angle.
5. Step back and make sure both the height and width are symmetrical.
6. Add some small gourds or miniature pumpkins as fillers to cover the rest of the soil.
7. Water the soil thoroughly and periodically throughout the season.
How to Decorate a Window Box for the Fall
As you can see it is quite simple and inexpensive to redesign a window box for the Autumn season. With a little foraging from your yard and purchasing some small items from a farmer’s market, you can have a lovely fall scene that will last through Thanksgiving. Tune in next time to see how to turn your fall window box into a glorious winter scene just in time for the holidays.
For more fall images for inspiration, click here.
I hope you enjoyed this post. Share it with friends and family and please leave a comment below!
Happy Gardening,
Nina