
What is a Landscape Berm? How to Make a Berm
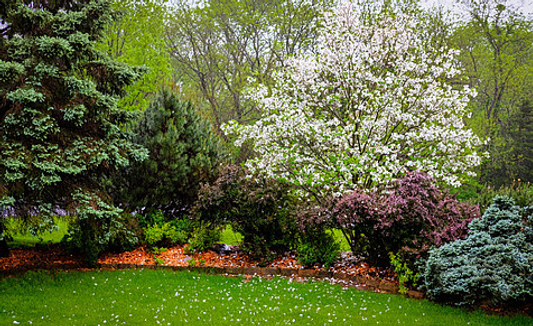
You’ve seen them everywhere. Mounds of dirt jutting up from the ground level covered with multiple shrubs, trees and flowers. Why would someone want to create such a thing and how do you form one? Read on to learn what a landscape berm is, why you might need one, and how to create it.
(Some of the links within this post are affiliate links on which I receive a small compensation from the sale of certain items with no added expense to you.)
(As an Amazon Associate I earn from qualifying purchases.)
What is a Landscape Berm?
A landscape berm is a mound of soil built on top of a level piece of land in order to add a flowing design to an otherwise drab area in a yard. They are linear, vary in height, and rounded. Once built you can add flowers, trees, shrubs, landscape rocks, garden ornaments, or any natural material that creates interest.
A landscape berm is different from a raised bed in that raised beds are square or rectangular and landscape berms are in a free form design.
Landscape berms are often seen on golf courses to make playing the hole more challenging. These berms do not, however, have shrubs or flowers on them.
I will also venture to say that an expert ski slope with moguls is a type of landscape berm. They are mounds of dirt on a surface. Voila!
Never the less, I will focus on garden berms in this post.
Why Do You Need a Berm?
Before you begin your berm, determine why you might need one. Berms are used for either practical or aesthetic purposes.
Practical:
1. To accent a path between different areas of the landscape
2. Aid in runoff on steep slopes
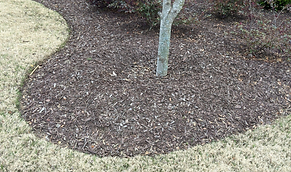
3. As a natural way to water a tree (elevating the soil around the tree, having the soil slope down to the trunk. Rain water will flow to the trunk and eventually the roots.)
4. Add a rich medium to otherwise hard soil devoid of nutrients
5. To elevate shrubs used as a privacy screen
6. As a noise barrier or a windbreak
Aesthetics:
1. Adding free flowing berms with lovely vegetation to diversity and add serenity to a garden
2. Creating interest on an otherwise flat, boring landscape
3. To raise the viewer’s eye level
Basic Guidelines to Building a Berm
There are no hard and fast rules as to how to build a berm. Here are a few things to consider before you begin your project.
Location:
Choose a spot where you can appreciate it from inside your home.
When my family moved into our home, we had nearly 2 acres of property that was basically flat farmland. There was nothing there. So I began by adding some interest directly outside my kitchen window and planted lovely flowers. You can also create a berm outside a picture window to give the illusion of bringing nature inside.
Add a berm any place where it is aesthetically pleasing to you.
To avoid insects climbing behind any siding, do not plant berms close to the foundation of a home.
Size of the Yard:
Your existing yard will dictate the size, shape, and design of your berm. Keeping things in proportion is very important. You want to create a somewhat long, meandering mound on the landscape. If your yard is too small, you will not have enough room to create a berm. Stick to adding specific gardens to your yard instead. Check out Beautiful Shade Gardens, or Very Small Garden Ideas.
Size and Shape of a Berm:
One general rule of thumb is to have a landscape berm four to six times longer than it is wide. The height should range between 18 and 24 inches and its sides should gently slope into the grass line.
Create a free-formed shape, with no sharp angles. Think of a kidney shaped pool or a crescent shaped moon.
Consider Types of Plants:
Remember to take into consideration water requirements when deciding which plants to choose, and where to plant them on the berm. Water will drain more quickly from the top of the berm to the bottom. Plant shrubs or trees that do not require too much water on top of the berm, and ones that thrive in a more moist environment lower on the berm.
In addition to water requirements, appraise the sunlight. A south or west facing berm will receive more direct and longer lasting sunlight than one built facing the east or north. Be sure to select the appropriate plants, shrubs and/or trees for the location of your berm.
Types of Fill:
You can use a variety of fills for your berm. Some people have used asphalt or rubble. I am not a proponent of that type of fill. I prefer keeping it organic and sustainable and using materials such as sand, plant debris or good gardening soil. When I created our berms, I always used gardening soil or top soil. This makes it much easier to plant your flowers and shrubs once the berm is created.
If you choose to use asphalt or rubble as a filler, be sure to cover it with enough garden soil to sustain your plants’ roots. Also, water the pile frequently before planting to fill in any air pockets between the rubble.
How to Build a Berm
It is not difficult to create a berm. Follow these easy steps and you will have built a beautiful addition to your landscape.
1. Draw a rough image of the berm on a piece of paper to use as a guide.
2. Using a garden hose or piece of rope, form the border of your berm on the ground. Step back, take a look, and alter anything to make it look more attractive. Remember to take in the big picture, not just the berm.
3. Once you have decided on the curvature of the berm, sprinkle the hose line with flour then remove the hose. You will have an outline for your berm.
4. With a spade shovel, dig down on the line removing clumps of grass around the entire berm. Leave a 2 to 3 inch gully around the perimeter.
5. Remove the grass approximately one foot in towards the center around the entire line.
6. Place cardboard or newspaper on top of the remaining grass in the berm in order to smother the grass. This process makes it much easier than digging out all the grass within the berm.
7. Pile up the fill on the cardboard/newspaper starting in the center of the berm and work your way out. One side can be higher than the other to create a rolling effect, or you can make the entire berm the same height. If you choose to have a rolling effect, do not place the highest peak in the center.
8. Tamp down the soil as you continue to add more fill to the berm until you’ve reached the height you desire. Remember to have a gradual slope on the edges of the berm where it meets the grass line.
9. You can either choose to leave the perimeter as is or add landscape edging.
10. Now plant your plants and cover the berm with 2 to 3 inches of good organic mulch. (Not a factory dyed mulch.)

Adding a Hardscape Wall to Your Berm
If you are building a berm on a sloped yard, you may have to support the berm with a stone wall. They are not difficult to build.
- Dig a wide trench around the area where you want to create the wall.
- Add sand to make for easy leveling.
- Add the first stone on top of the sand; use a heavy sturdy rock because it will be supporting the weight above it.
- Level the stone using a level.
- Add subsequent stones on either side making sure the bottom level is level!
- Cut the stone by scoring it with a sharp knife, take a chisel and hammer and cut across the line, and break it apart. Be sure to wear safety glasses.
For a more in depth description of how to build a stone wall and a berm, see the video below.
How to Build a Landscape Berm
As you can see, it is not difficult to build a berm on your landscape. Once you have determined the purpose of the berm and decided on its location and size, it should only take you a days of labor to complete it.
After it is formed, the fun begins! Now it’s time to plant those lovely shrubs, trees, and/or flowers on your newly created berm and then sit back and enjoy the scenery!

I hope you enjoyed this article. Please leave a comment below. I’d love to hear how you made out.
Also, please share this post and my site with others who would like to become avid gardeners.
Happy Gardening,
Nina